Today I want to show you the best writing tools I use to develop the content I publish for my other clients.
Even though almost all of the writing software tools I mention have premium plans with lots of powerful features, they are all free to use.
Sounds interesting? Let’s jump right into it.
The Best 17 Writing Apps I Have Ever Used
The following three tools are the ones I use to write all my content, whether they’re the outlines, first and second drafts, and the ready-to-publish content.
Spines
Spines is an all-in-one publishing platform built for modern authors — write, edit, design, publish, and market your book with just a few clicks.
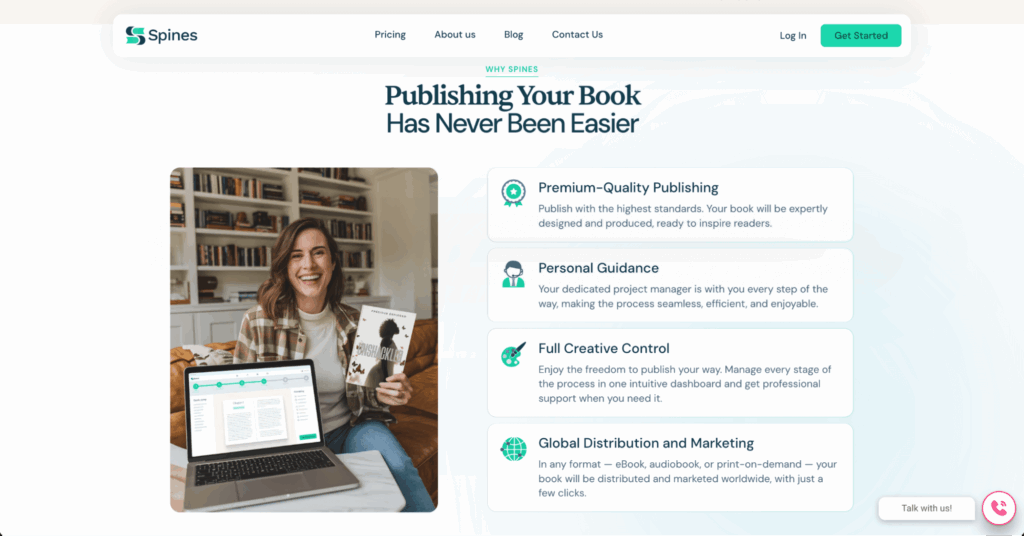
Spines is a modern publishing tool designed to help you go from writer to published author—without gatekeepers, tech headaches, or expensive services. It’s perfect for first-time authors and experienced writers alike.
One of the standout features of Spines is its all-in-one dashboard. You can upload your manuscript, instantly certify copyright, and then let the built-in AI help you edit, format, and prepare your book for print, ebook, and even audiobook—all in one place.
But where Spines really shines is in marketing and distribution. You get your own beautiful sales page, plus tools to launch ad campaigns across Amazon, Facebook, and Instagram. And since all royalties and sales stats are tracked in your dashboard, you always know how your book is doing.
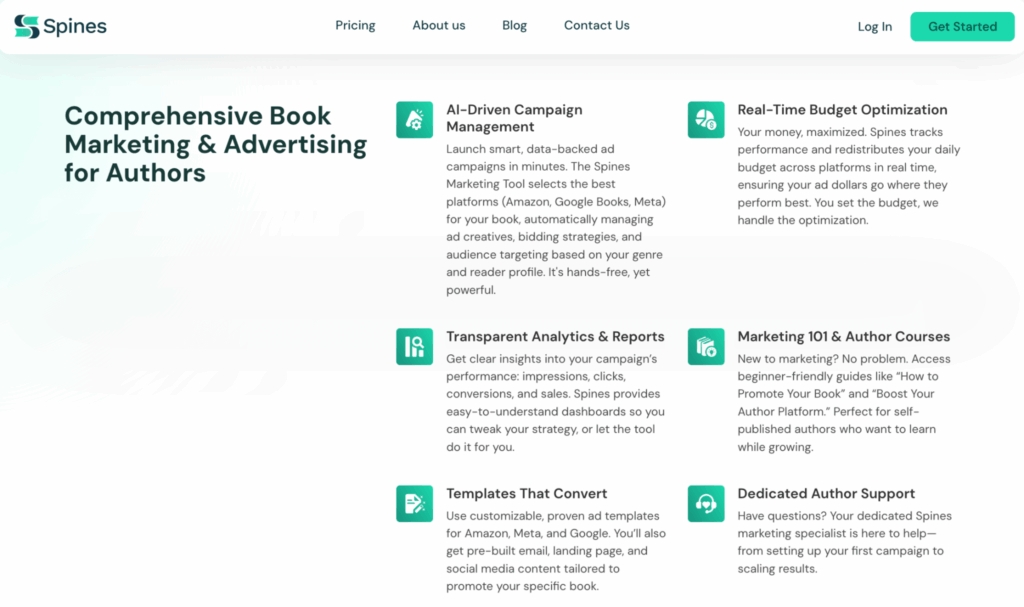
The design tools are also beginner-friendly. You can generate professional covers, get custom illustrations (especially helpful for children’s books), and access templates for every format.
I recommend Spines because it gives authors full control—creative, financial, and technical. It’s fast, intuitive, and genuinely made for modern self-publishing.
Price: Starts at $1,198 for softcover publishing. Multi-format plans (print, ebook, audiobook) from $1,098/month. Full package with translation available for $998/month.
Typefully
Typefully is an AI-powered writing tool built for social media content. It allows you to write, schedule and publish your posts on multiple platforms like X (Twitter), LinkedIn, Threads and Mastodon.
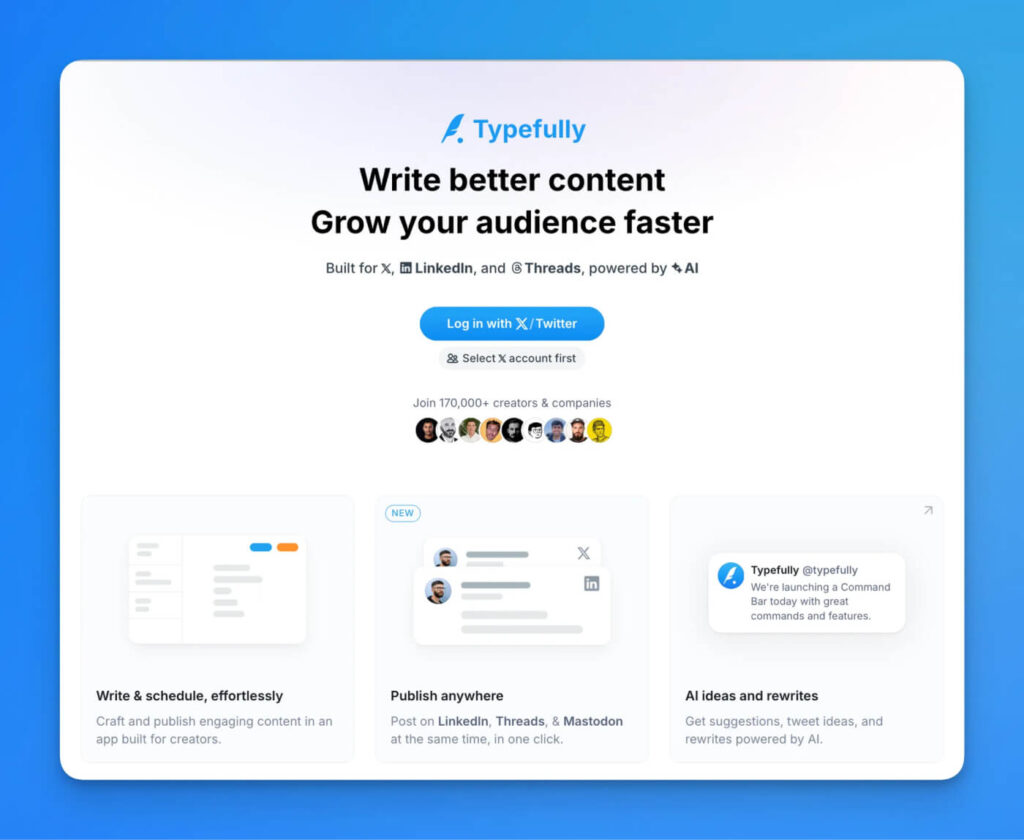
One unique aspect about Typefully is its clean and distraction-free editor which you can use to write without all the noise you’d have if you were writing directly on a social media platform.
Plus, it provides you with powerful analytics so you know what type of content and writing resonates the best with your audience.
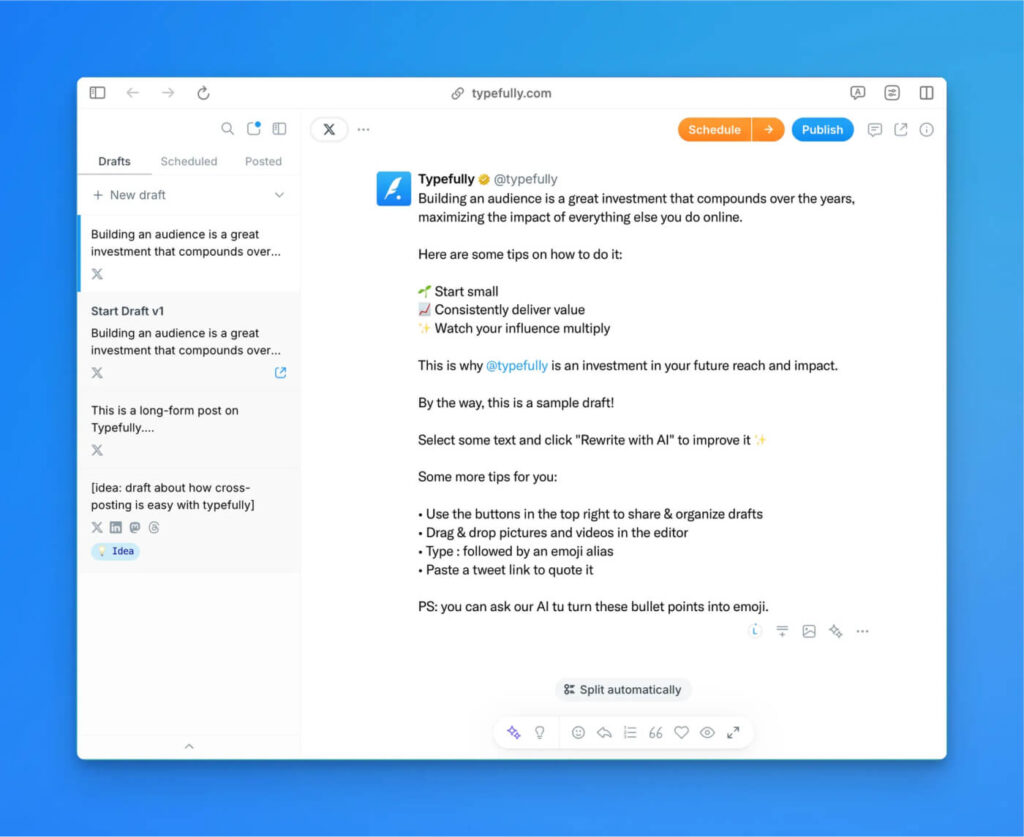
The built-in AI writing assistant is very useful and handy since you can simply select any text and improve it with great ready-to-use prompts or you own custom prompts. My favorites are “Fix grammar” and “Make it punchier”, they always improve my posts.
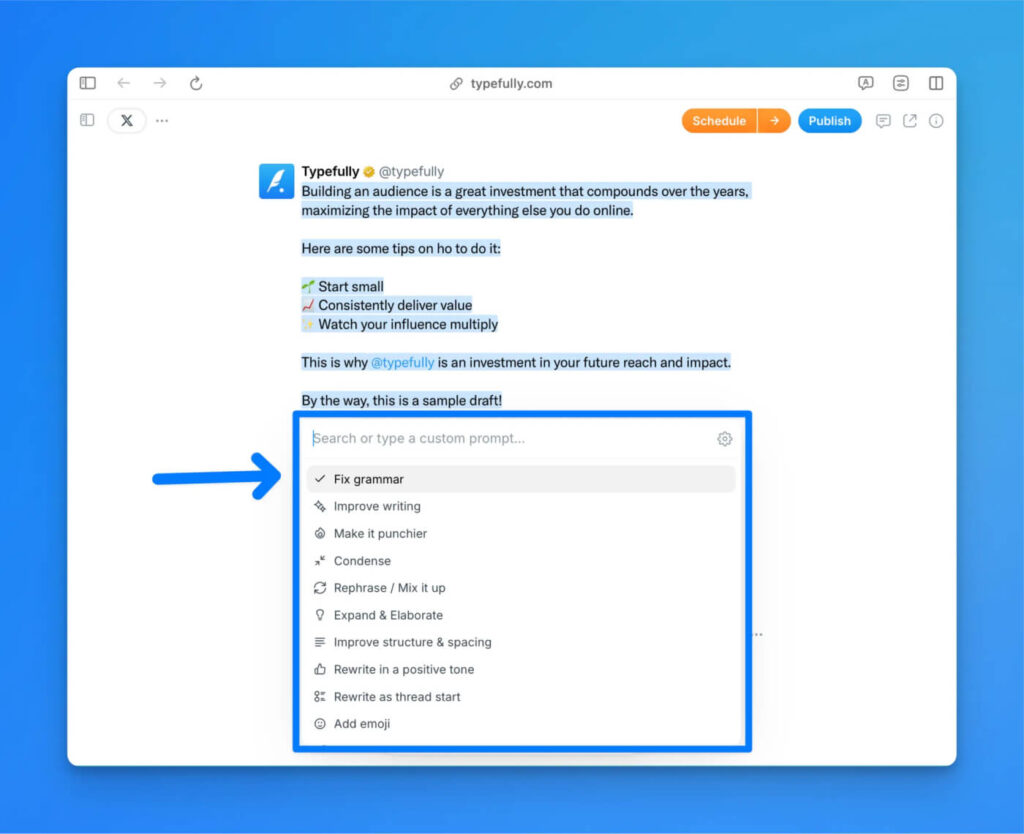
I love and personally use Typefully to cross-post easily on all my socials due to its beautiful user interface but also because it offers detailed analytics which help me analyze how my content is doing.
A final mention of something very useful is its engagement boosting features like auto-repost which help you automatically reshare your content so you cover multiple timezones.
Price: Free with premium plans that start at $12.50 per month.
Bear
Bear is a minimalist writing app for writers who want a distraction-free environment. Its simplicity and ease of use has quickly made Bear one of the most popular writing apps in the market.
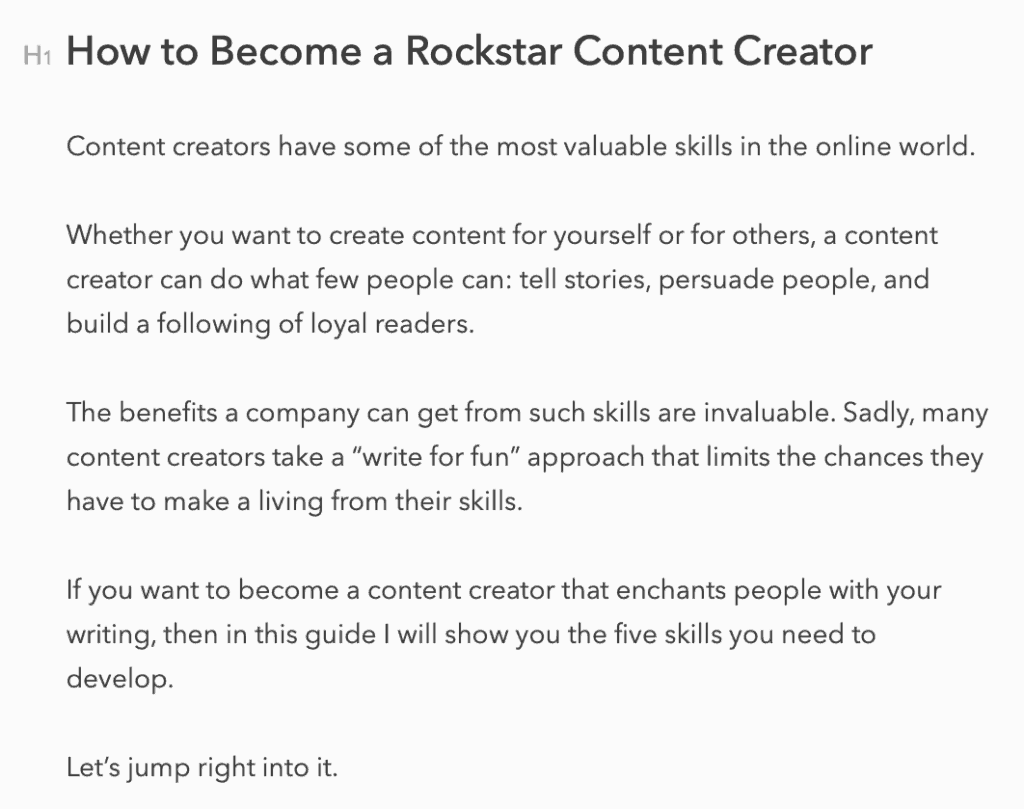
In contrast with other writing tools (like Evernote which I feature next), Bear has a single-minded focus on writing. The app has few bell and whistles, and such is the reason why it’s so good to use. For a paper writer, this focus on pure writing without distractions can be invaluable.
It seems that the company who developed it, Shiny Frog, had one single target audience in their mind: content creators. Oftentimes, content writers have the problem of getting distracted with all the available options most writing tools offer.
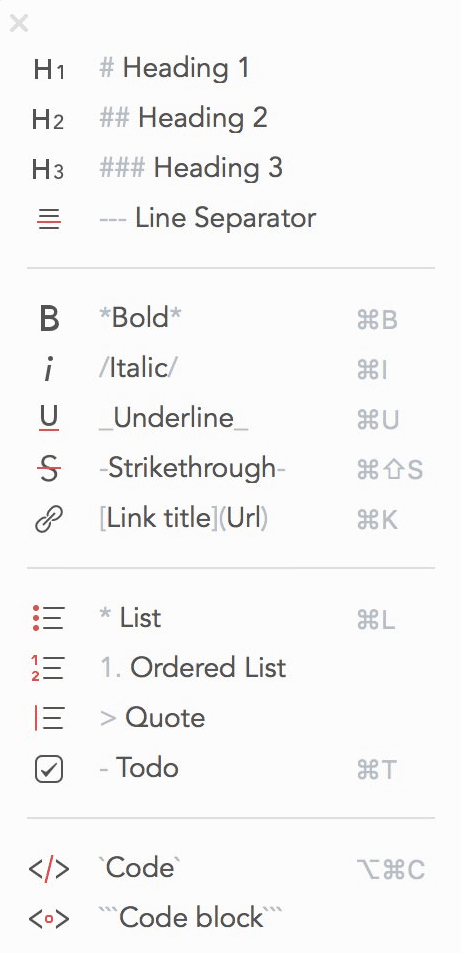
Bear, in contrast, offers a few formatting options, like headings (H1 to H6), emphasis formats (bolding, italics, and underline), lists, and in-line formatting.
What’s more, the tool offers word and character counting, the total reading time, and the number of paragraphs.
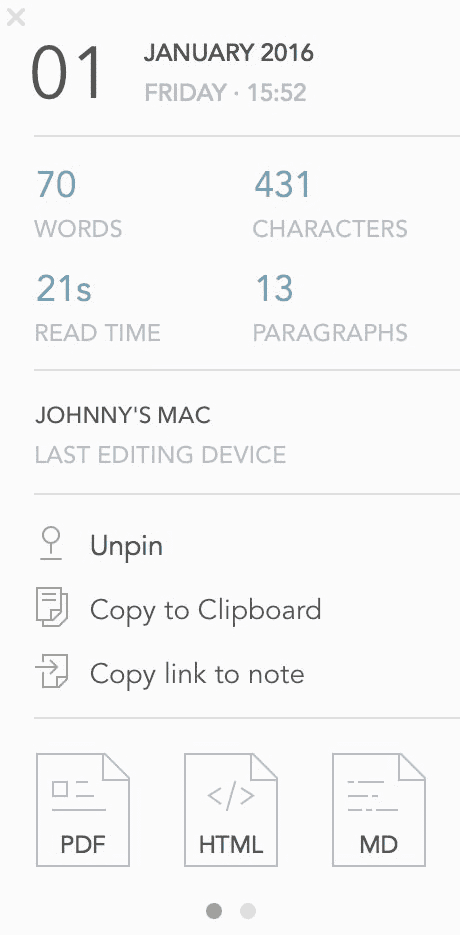
Such options are extremely useful for my daily writing habit of writing at least 500 words a day. For example, as of the previous paragraph, I’ve written 286 words, which means I need to keep going if I want to hit my daily goal.
Also, the tool makes it dead easy to export your content in PDF, HTML, RTF, and DOC formats, among others. If you want to copy and paste your content into Google Docs (which is what I do) or WordPress, you only need to select the right option and you’re done. There’s no need to fix the formatting after you export your content, unlike other writing tools.
Since Bear helps me fight distractions—the fact you can use it offline helps a lot—it’s the perfect tool for writing your first drafts.
Bear is the kind of tool that supports distraction-prone writers create content and nothing more. The best writing software you can ask for, in my humble opinion.
Price: Free with premium plans: $1.49 per month or $14.99 per year.
Evernote
Evernote is a powerful note-taking app that comes with a suite of features, from screenshot taking to to-do lists to team collaboration, and much more. With over 225 million users, Evernote is the most popular note-taking app of the market.
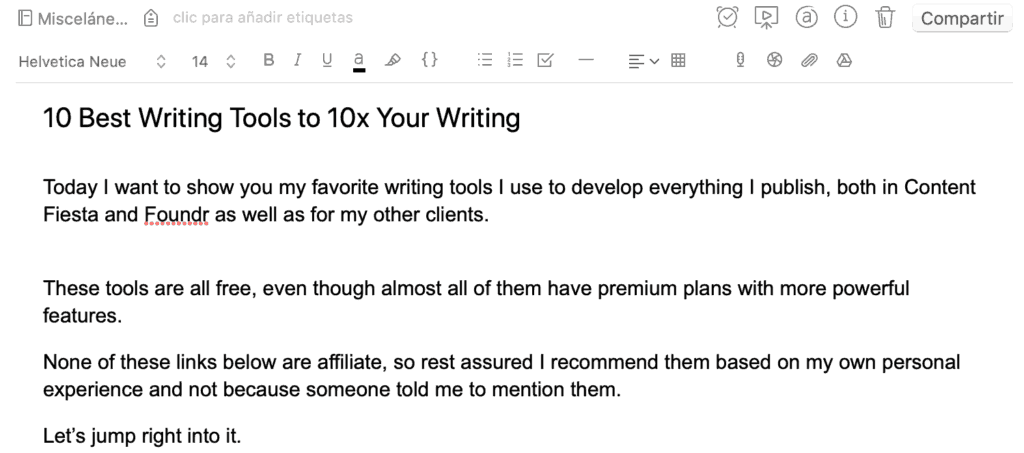
Evernote can be a wonderful writing app for any type of writers and marketers alike. Among the many useful features that writers will like to use you have:
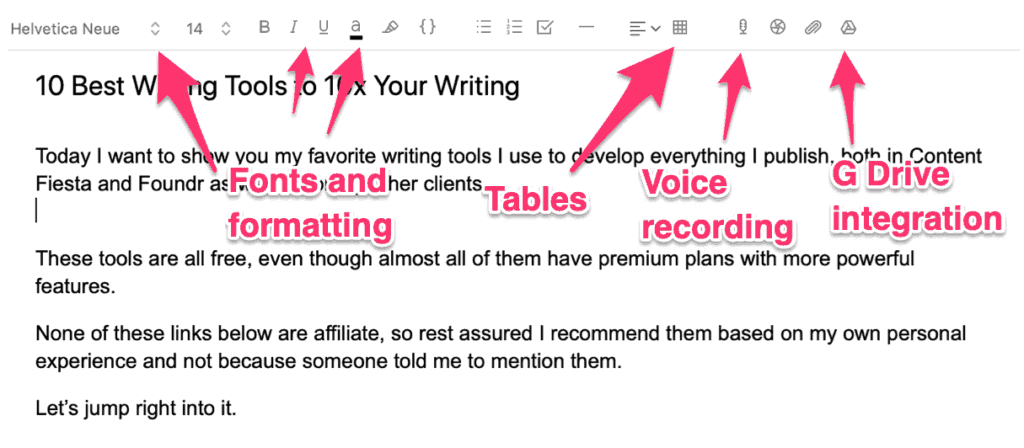
- All the basic formatting options: bolding, lists, code in-line, etc.
- A wide range of fonts and font sizes (which Bear lacks)
- Typography colors
- Tables
- Voice recordings
- Google Drive integration
- Attachments
You can also create presentations right from the app—something that can come handy if you need to show your content to your boss or client. Also, you can access the history of the edits done, similar to Google Docs. This can be very useful for when you want to go back to a previous edit.
If you’re the kind of writer who needs a tool with all the features you could ever hope in a writing app, then Evernote will likely be the right tool for you.
Originally, Evernote was my first writing tool; I used to do all my research as well as write all my drafts and articles in there.
Eventually, I realized Evernote makes it hard to export content to Google Docs; somehow the formatting got all messed up. Then, it distracted me too much—since I also had personal notes in there, the draft management got too complicated.
I still love Evernote for saving the highlights of my book, as I explained in my becoming a better writer article, and some research. It’s also a good alternative to the standard note app from Windows or Apple.
All in all, Evernote is a great second option for any writer who wants a robust piece of software for all writers alike.
Price: Free with premium plans. Starts at $7.99 per month.
Google Docs
Google Docs is the equivalent of the classic Microsoft’s Word, but instead of being clunky and annoying—as all Microsoft’s products 😅—it’s useful and pain-free.
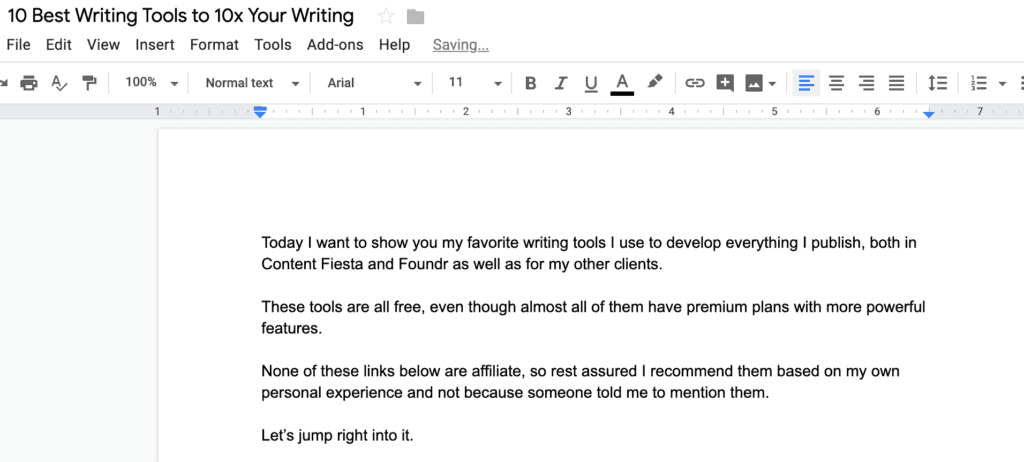
The main benefit of Google Docs is that you can use it anywhere—it works offline most of the time—it’s lightweight, void of unnecessary features, and obviously free of use.
Google Docs is also great if you work with an editor or client who wants to make comments or make suggestions without disrupting your content.

One of the best features of Google Docs is its capacity to integrate it with Google’s suite of tools and, most importantly, a large list of free add-ons.
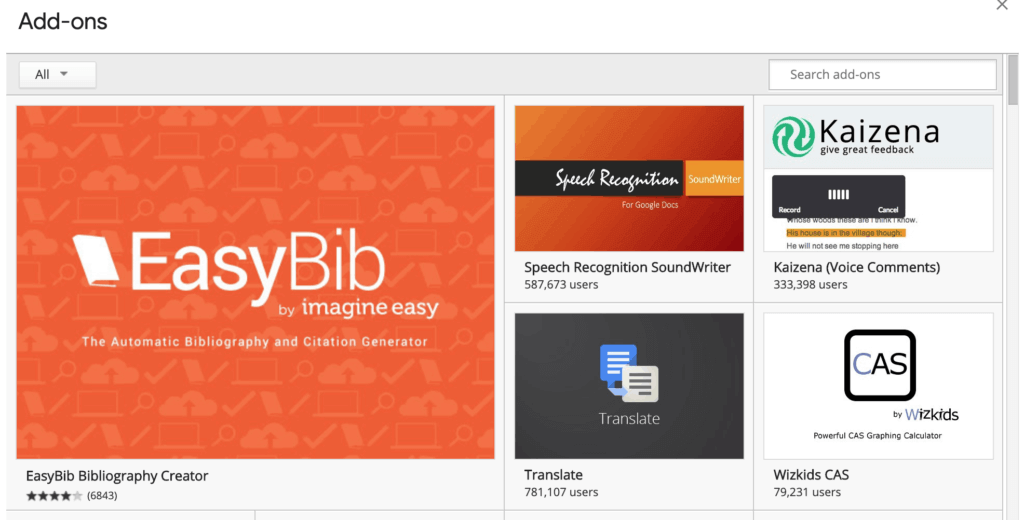
For example, you can add a table of contents to your content, use speech writing software, add a dictionary and thesaurus, and add a free grammar checker like ProWritingAid.
Google Docs is my go-to writing tool for when I’ve finished developing the outline and first draft and I’m ready to pump the second one and make the final editing touches.
While it’s minimalistic, the fact Google Docs lays in a browser tab means I’m always a click away of any distraction. You know very well how easy it is to run away from your writing commitments when you get into a dead end.
Google Docs doesn’t help me combat those urges, which is why I use the uber-minimalist Bear and then Google Docs to edit the prose I write in the former. Still, Google Docs is one of the best writing tools you can ever hope to use.
Price: Free.
Editing Tools
When you write, you will make grammar mistakes. That’s a sad truth of the writer’s life.
While you should always aim to re-read everything you write at least twice before you publish it, you will miss a few key errors that will ruin your piece without you noticing it.
The following three tools will help you find those grammar mistakes and fix them before they wreak havoc your piece. More importantly, they will give you critical recommendations to improve your style, which will make you a more proficient writer.
Grammarly
Grammarly is an AI-powered grammar checker and writing assistant that helps you find grammar errors and fix them right on the spot. It’s my go-to editing tool thanks to its ease-of-use and effectiveness.
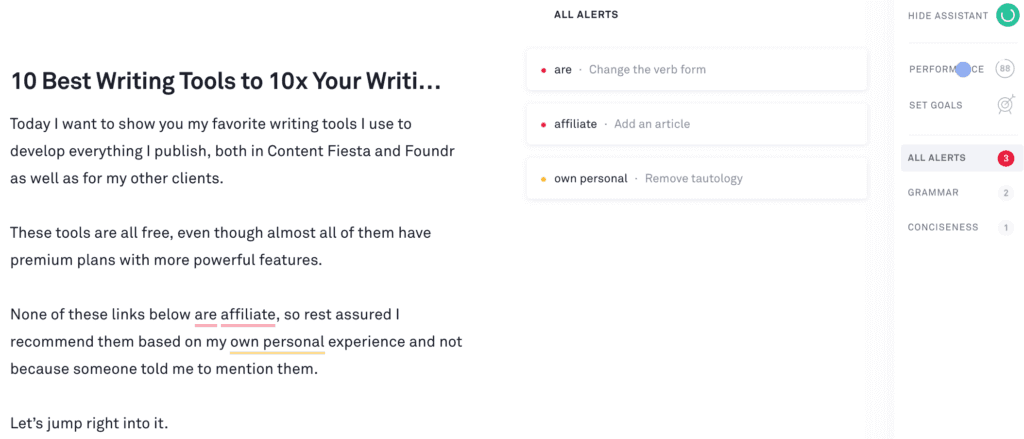
Before Grammarly, I used to spend hours checking every sentence I wrote to make sure I didn’t make any mistake. The fact I’m not a native speaker didn’t help either. Looking back, I’ve made so many silly mistakes I cringe just by reading my old content. 🤦♂️
Thanks to Grammarly, I’ve saved my ass so many times that I safely say I’ve earned a lot of respect from editors and clients thanks to my impeccable English usage. Some even ask me how I do it despite not being a native speaker—Grammarly is the answer. I’ve written an extensive Grammarly review already, so to understand how this tool works, please read that guide.
As soon as I’ve finished writing my second draft and editing it—which includes a re-read of the entire piece—I copy and paste the article into Grammarly’s app and see the suggestions it comes up with.

After I do that, I start checking every suggestion—most of the times, the suggestions reign in the hundreds thanks to the fact I’m a premium user. 😎
While the free version gives you most of the most basic grammar, syntax, and punctuation suggestions, the premium version gives you synonyms, advanced grammar tips, and even writing style advice.
Grammarly comes with a free Chrome extension that helps you correct your grammar as you write an email, a Facebook post, or anything you put in your browser.
If you are a writer who makes a living with your words, then you need a grammar checker. So far, Grammarly is my favorite tool; one that has helped me become a much better writer.
Price: Free with premium plans that start at $11.66 per month.
ProWritingAid
ProWritingAid is a grammar checker, style editor, and an AI-powered writing mentor.
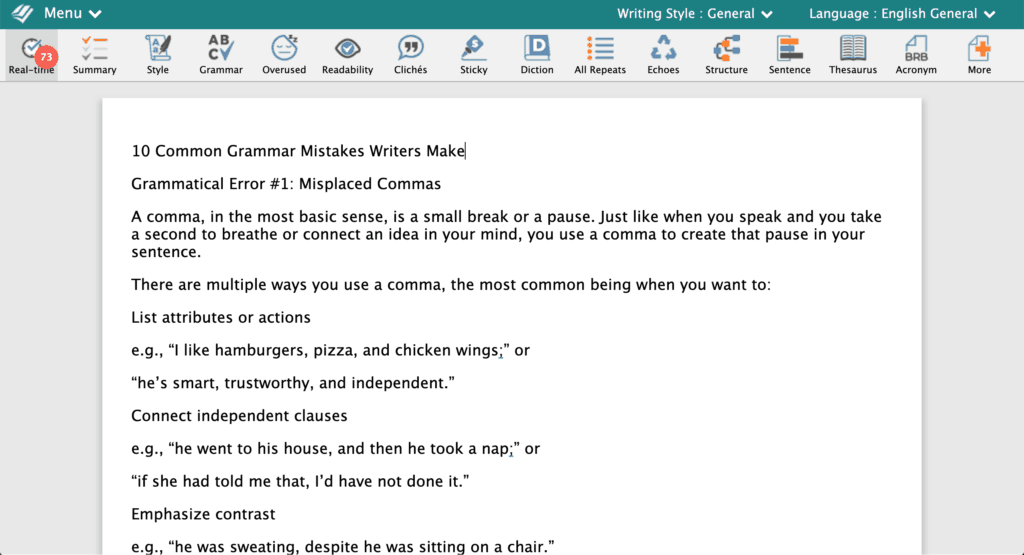
ProWritingAid is a new writing tool I’ve had the luck of starting to use thanks to an offer I got from the company. While I’m not being paid to talk about them, I can say they’re a great alternative to Grammarly.
To start using this tool, you first need to upload or paste your content into their editor. Then, you will be given a summary of all the suggestions for improvement.
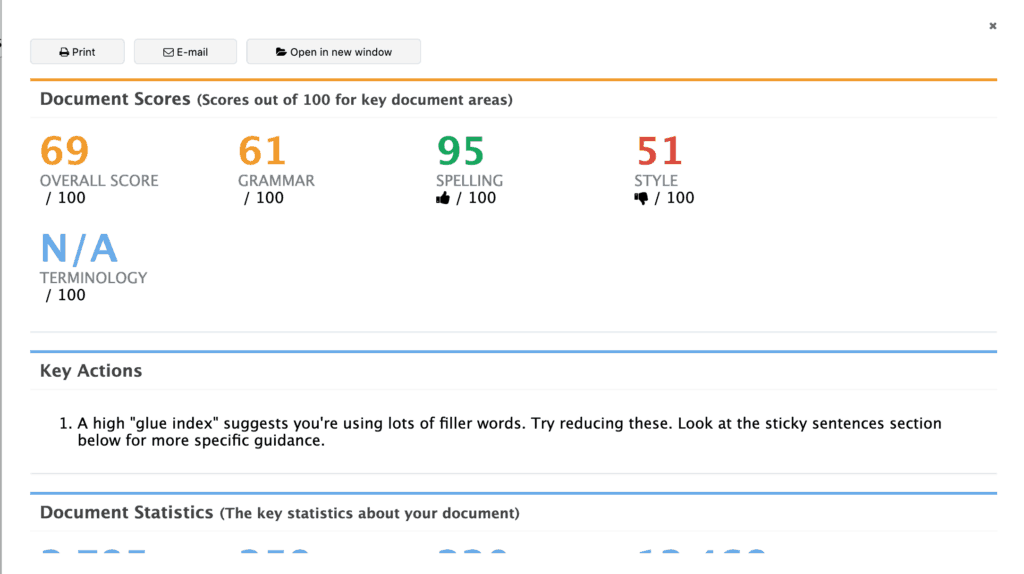
It’s interesting that they simplify their suggestions into three groups:
- Grammar
- Spelling
- Style
What’s more, they offer a few interesting set of “Key Actions” that I’ve found valuable and relevant.
I also like their word usage analysis, which then they compare it with the rest of their users.
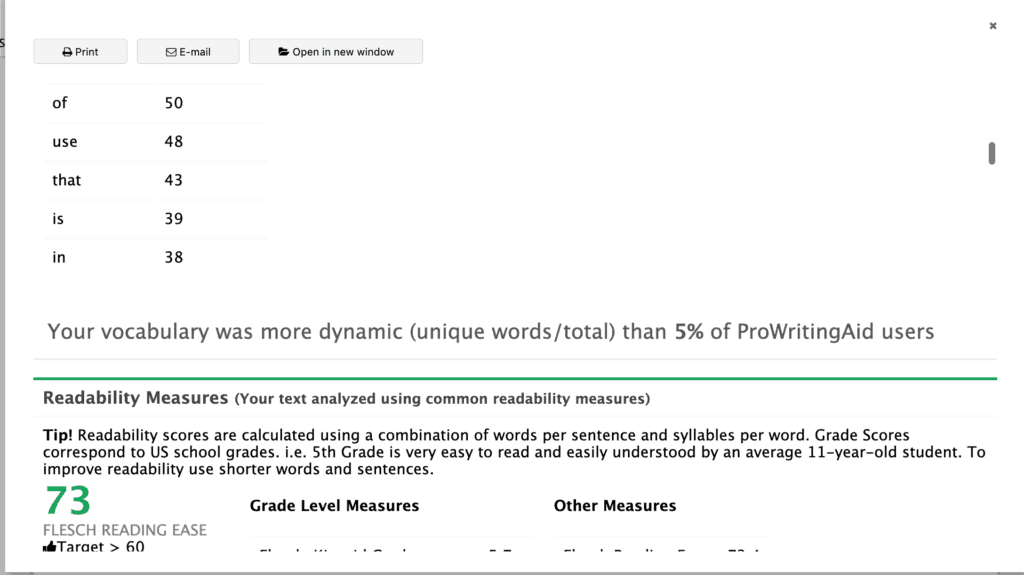
They also share the most common readability measures, like the Flesch-Kincaid Grade, which analyzes the ease of reading of your content. The higher the reading score, the easier it’s to read.
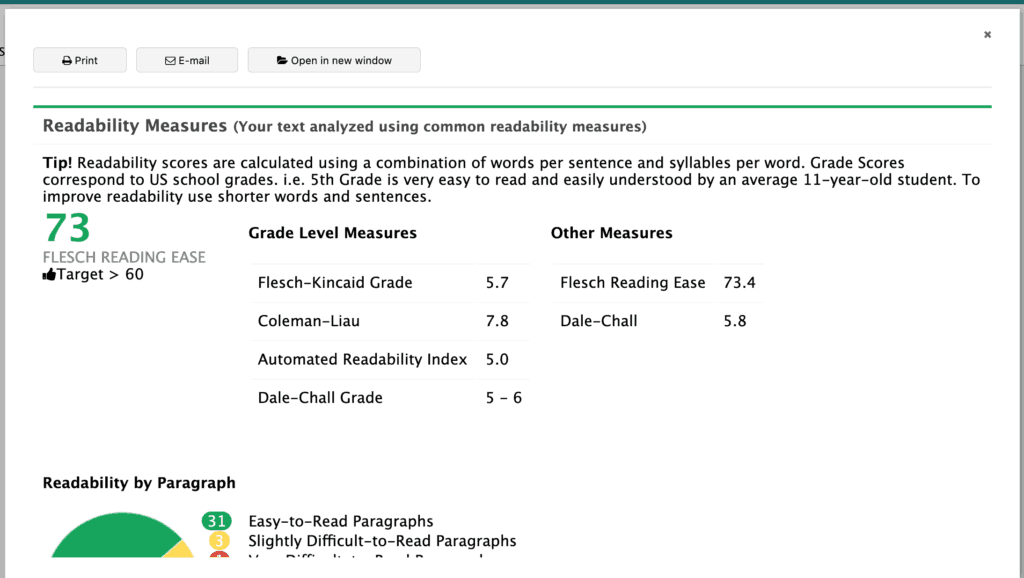
In contrast with Grammarly and other grammar checkers, ProWritingAid provides very analytical and granular writing recommendations, something I find refreshing. It’s an alternative but still useful way of improving your writing.
If you are writer that takes its grammar seriously and want to create content that’s pristine as water, then using ProWritingAid is a great option.
Price: Free and $60 for a yearly license.

Hemingway Editor
Hemingway is a free alternative content editor that, like Ernie, will make your content tight and powerful.
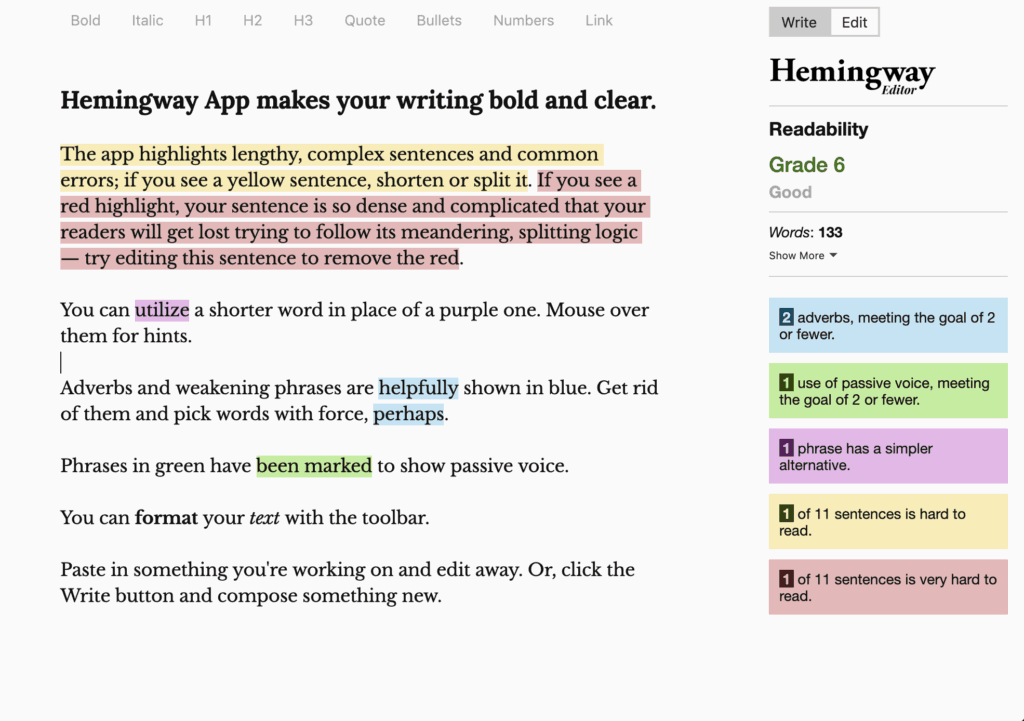
One of the most interesting aspects of Hemingway Editor is its color highlighting of their improvement suggestions. Their suggestions focus on a few key aspects of your writing:
- Adverbs use
- Passive voice use
- Ease-of-reading
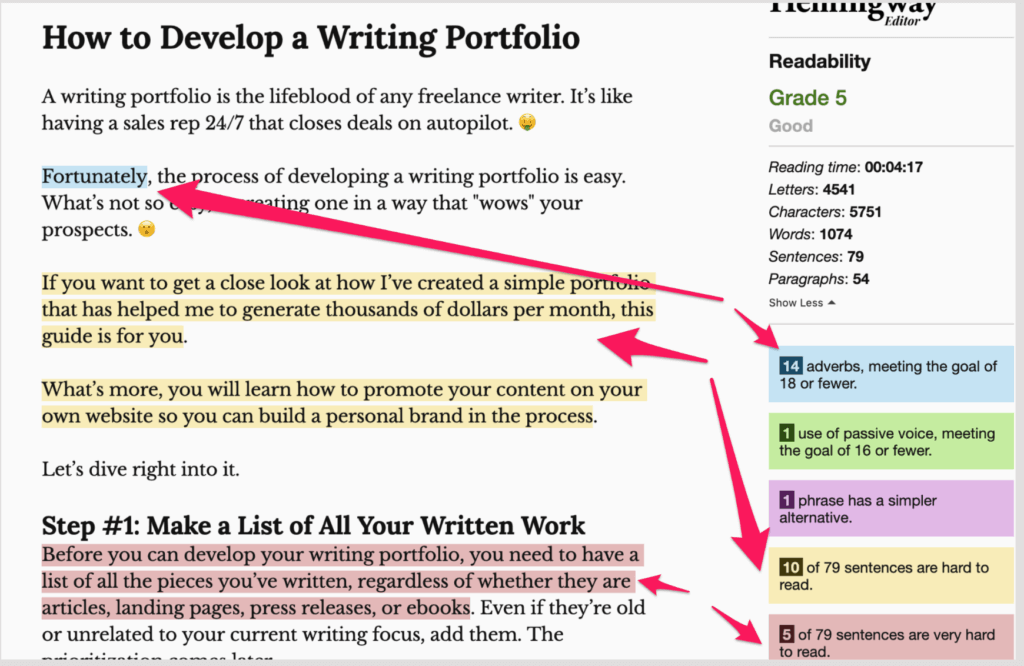
These are basic suggestions, no doubts, but I like the fact they indicate broad stylistic problems instead of specific word issues, like Grammarly or ProWritingAid tend to highlight.
Hemingway Editor also shared the word and sentence count, approximate reading time, and even specify the results of the Flesch-Kincaid Grade readability test.
From their entire writing analysis, the tool assigns a final readability score.
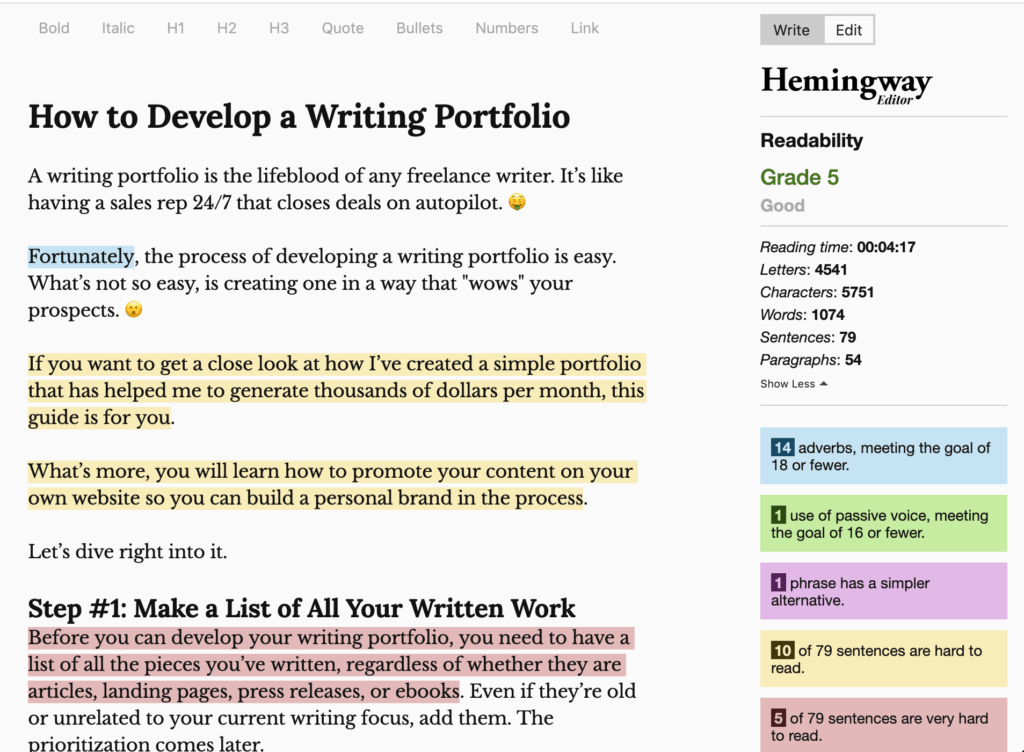
Because I use Grammarly and ProWritingAid, which basically cover the same ground as Hemingway Editor, I don’t use this tool. Also, I like the more detailed suggestions the former tools give, something Hemingway lacks.
Such comparison, however, would be unfair to Hemingway Editor. The whole idea of the tool, I believe, is to give simple yet useful recommendations. Therefore, if you want a quick editor to give you a few key suggestions, Hemingway is the tool you need to use.
Price: Free.
PDF Guru
PDF Guru is a simple yet powerful online tool designed for freelancers and professionals who regularly work with PDF files. Unlike heavy desktop software, it runs entirely in your browser, no downloads or installations required.

With PDF Guru, you can merge, compress, convert, or split documents in just a few clicks. The platform supports popular formats like Word, Excel, JPG, and PowerPoint, while ensuring your document’s layout and quality remain intact after conversion. Its clean interface and quick processing make it especially convenient on mobile devices. Best of all, there are no watermarks or distracting ads, just straightforward PDF editing.
Price: 7-day limited access from $0.99; 7-day full access from $1.99; annual plan from $24.95/month.
Research
Research is an essential part of any writer’s life, yet one of the most complicated. You can take notes from many different sources, but if you don’t organize your ideas properly, by the time you have to write your piece, it will be hard to get a hold of them. You won’t know what notes to use and which ones to avoid.
The following three tools will help you with the entire research process and organize all your notes in one place.
Pocket is a Chrome app that helps you save content to read later. If you’ve ever said to yourself “geez, I’d love to read this article but I don’t have the time,” then Pocket is your go-to option.

First and foremost, I love Pocket because it helps me organize all the articles I want to read before I can actually take the time to read them. When I was learning how to create content and promote it, Pocket was my BFF; I had dozens upon dozens of articles in there that taught me everything I know now.
As I started to write increasingly more, I started to take a lot of time researching new sources of information to add to my content. My only problem was that I couldn’t keep up with all the data I gathered. Then I realized Pocket was going to be my savior.
When I research content, I like doing a first round of fast searching for data, without taking the time to read everything; as long as it seems useful and relevant, I save it.
Instead of having to bookmark all of these sources or adding them into my note app, I save them to Pocket with the tag “research.”
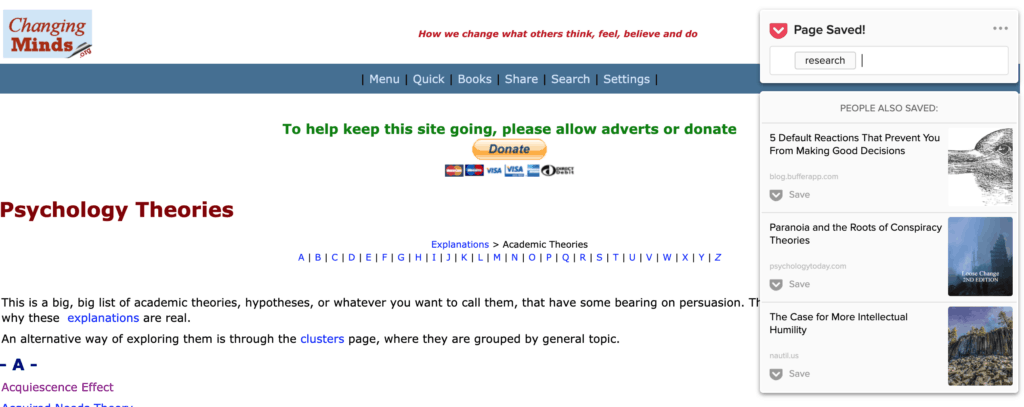
Once I’m done with the first round of research, I go back to Pocket, select the “research” tag, and read all the pieces one by one.
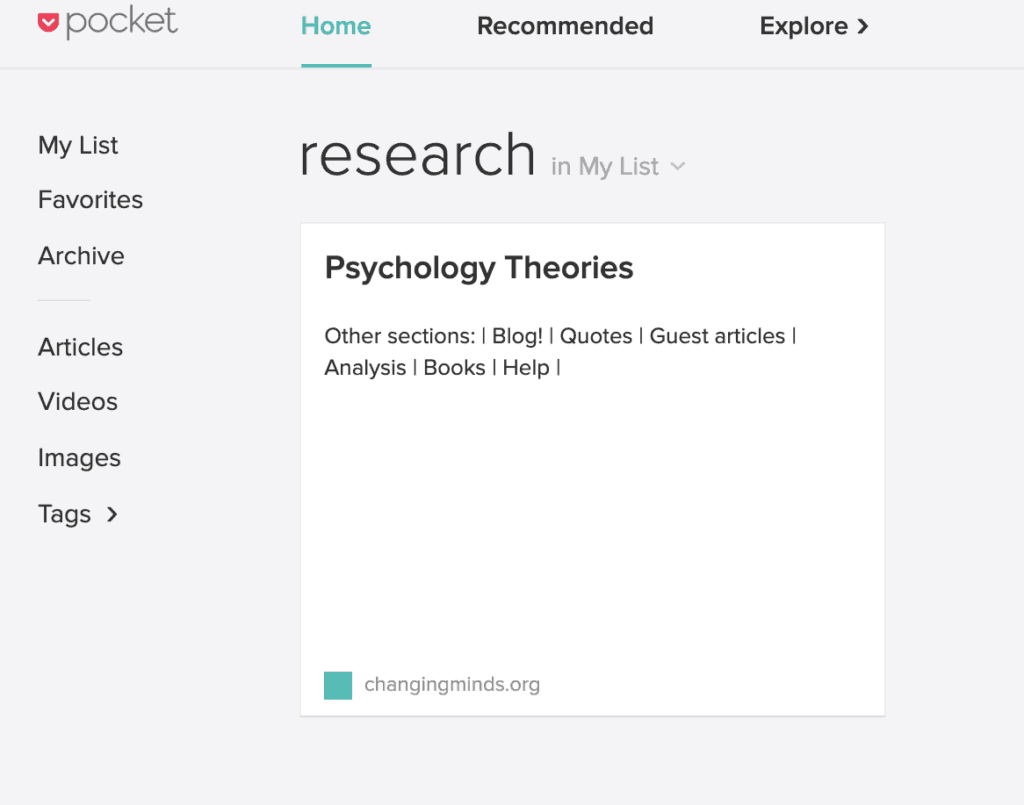
The same I do when I’m looking for quotes, case studies, or any type of research.
Pocket is light, easy to use, and extremely valuable for content writers like me. If you want a place where to organize all your research, give Pocket a try.
Price: Free and $44.99 for a yearly plan.
LINER
LINER is a Chrome extension that helps you highlight anything online. Instead of saving entire pieces like you’d do with Pocket, LINER helps you save individual paragraphs, sentences, or words. Think of Pocket as a bazooka, and LINER as a sniper. 😉
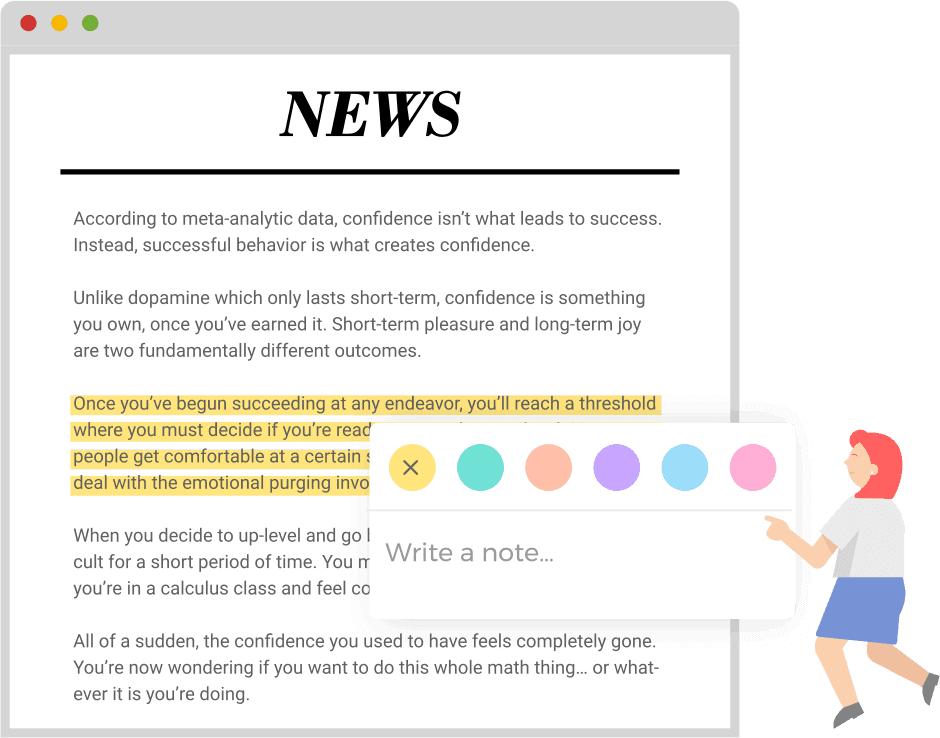
Pocket + LINER = A Match Made in Heaven
As I said before, my research process starts by saving as many interesting pieces in Pocket and then moving on to reading them one by one. Whenever I find an interesting quote, stat, result, or data that could help me with the content piece I’m working on, I don’t copy and paste each individual data point directly into my article; I use LINER instead.
After you install the extension and create an account, you only need to highlight whatever you like to save in any given article, and then you click on the highlighter button that shows up.

Then, you save that selected content and you click on “Go to Dashboard,” which will take you to your LINER dashboard where you have all the highlights for each piece you’re working on.

Pro Tip: Use Folders
I like to create folders for each piece I work on and save the highlights separately so it’s easier to find them once I’m writing the piece.
Whenever I start working on a piece, I take a look at all the information I’ve saved in LINER and take each piece into my article.

Just like it happens with Pocket, LINER is useful on its own as a learning tool as well as a researching one.
If you want a tool that helps you save specific pieces of content—like quotes and stats—LINER is your tool.
Price: Free with premium plans that start at $4 per month.
Evernote Web Clipper
Evernote Web Clipper is a Chrome extension from the note-taking app mentioned before.
While the former tool is a wide-ranging app that can help you write, edit, and organize your content, its Web Clipper lets you take screenshots, add annotations to it, and even highlight content for your research.

To start, Evernote Web Clipper is wonderful for whenever you are writing a tutorial article and you explicitly want to show how the thing you’re writing about looks like.
In my many tutorials, like the one I wrote about developing a writing portfolio, I’ve used Evernote Web Clipper to show how to implement the ideas I was mentioning.
For example, when I was writing about the process of opening a portfolio in Contently, I added many screenshots showing where to click, what to do, and how that action step looked like.
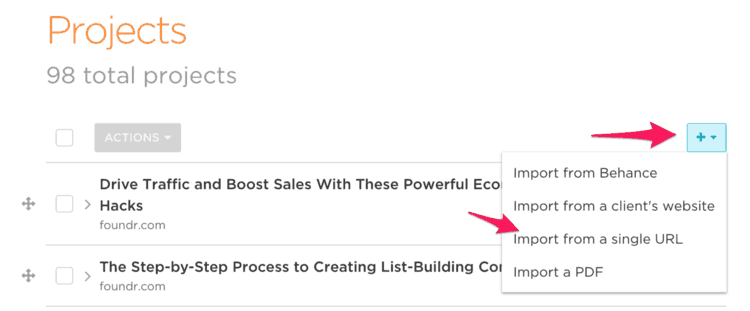
In this context, I use Evernote Web Clipper’s arrows and text features to create all my images.
Alternatively, I take a screenshot (cmmd + shift + 3 for Mac users) and then I use Skitch, another Evernote tool, to edit the images. The end result is the same one as the one from Evernote Web Clipper.
Another great use for Evernote Web Clipper is to research content. While Pocket and LINER help me save individual posts and pieces of them, Evernote Web Clipper also lets me do the same, albeit with a decreased ease of use.
To illustrate this point, let’s say I was writing an article about improving grammar (like I’ve already done in this blog). Throughout my research process, I was in this article:
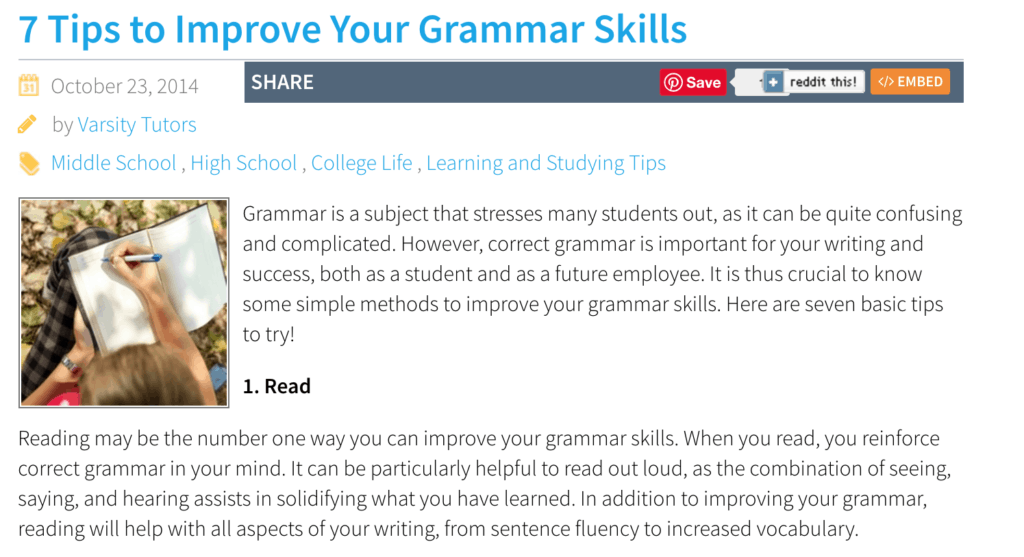
If I wanted to take a piece of that article for research, I’d only need to follow four simple steps:
- Click on the extension button at the top right along with the other Chrome extensions
- Click on “Screen capture”
- Select the area I’d like to capture
- Add the arrows, text, and other features Evernote Web Clipper lets you use
The best options I most often use are the text, arrows, and blur options.
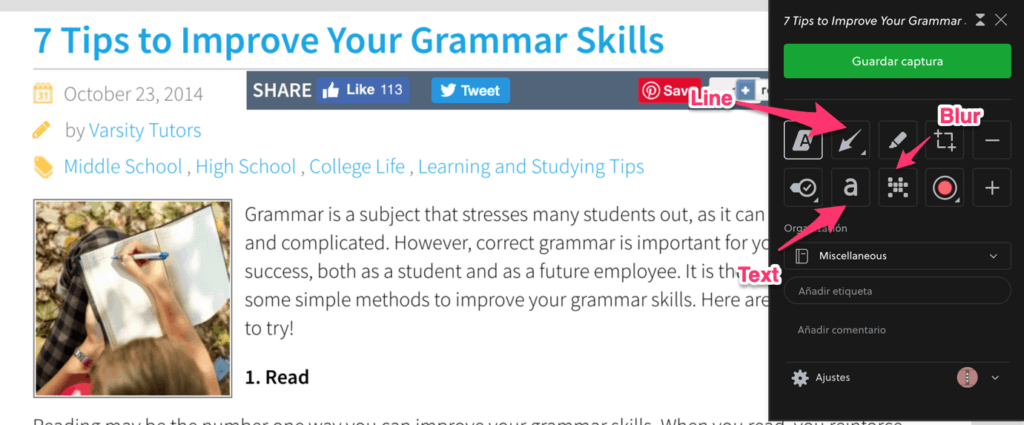
All in all, Evernote Web Clipper is a fantastic tool to embellish your content with magnificent screen captures.
Price: Free.
Extra
The following tool is what I’d consider an “honorable mention;” a tool that I use sporadically but have helped me a lot.
You don’t have to use it if you don’t want to, but as you will see, they are more essential for any word crafter than you’d think.
Squibler
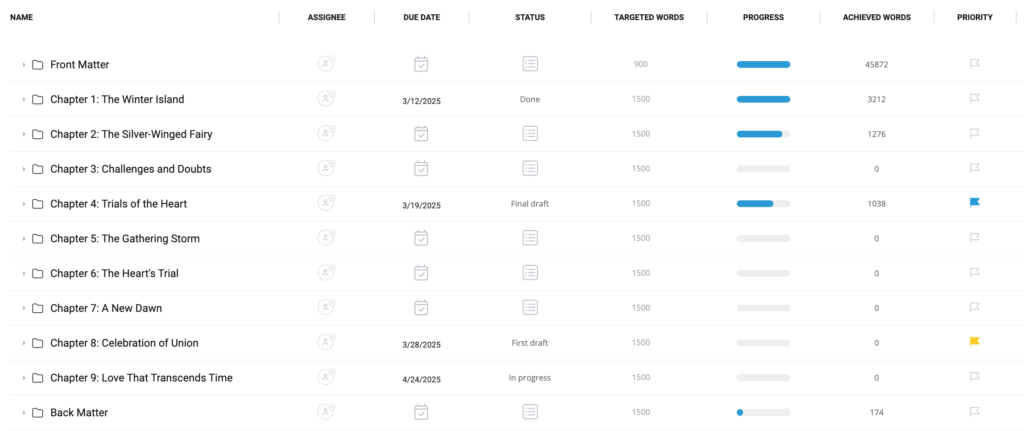
Squibler is an AI-powered writing tool designed for authors, book writers, content writers, and scriptwriters. It provides a structured writing environment that helps streamline the writing process, making it easier to draft, organize, and manage full-length books and screenplays.
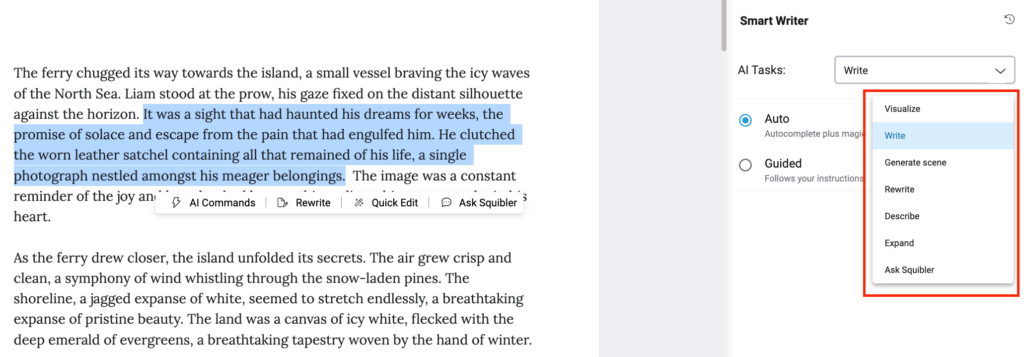
The feature I love the most about Squibler is its Smart Writer, an AI assistant that writes as you command it, just like a writing assistant. I was shocked to see how its AI helped me with rephrasing and expanding a tricky scene I was stuck with. It actually serves as the best book-writing tool with all these capabilities.
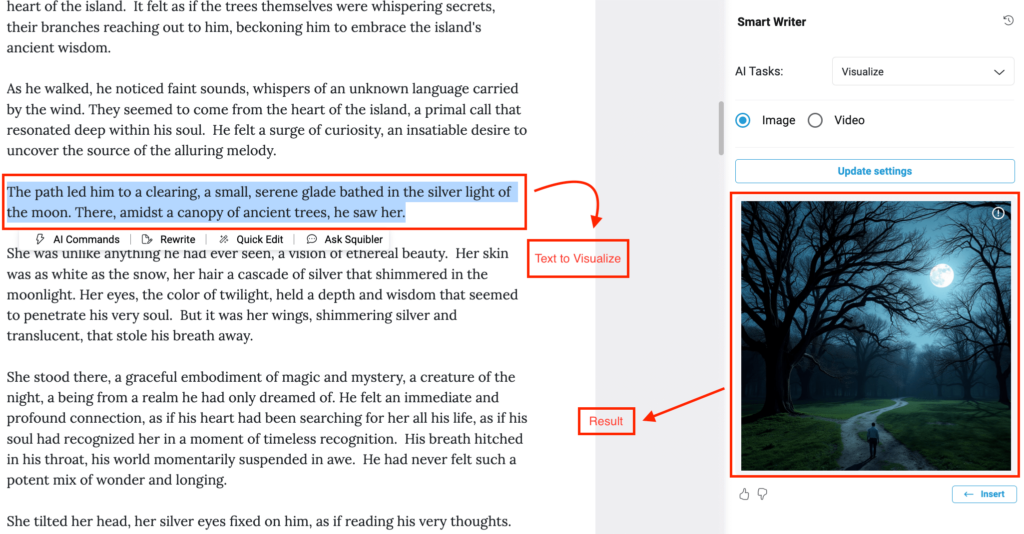
Another great feature is AI Visualize. This allows you to generate images based on text descriptions, which is great for those who like to visualize their story elements. I like how it reduces the need for a designer when I can do it all by myself with this tool.
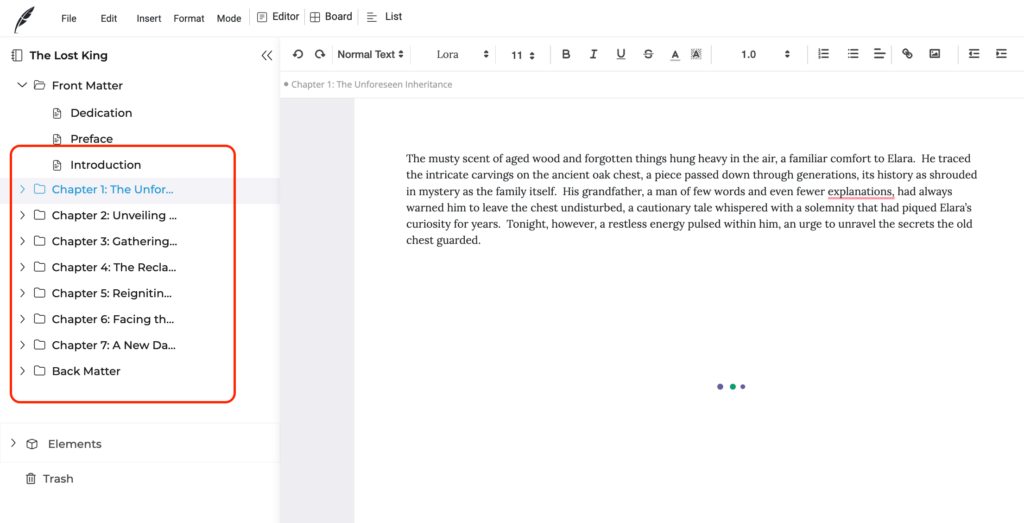
Squibler also offers powerful organizational features. You can write chapters separately, move them around with a simple drag-and-drop function, and view an automatically generated table of contents (though the chapter numbering must be manually adjusted).
The writing templates for different genres like adventure, romance, and mystery, can help structure your book right from the start.
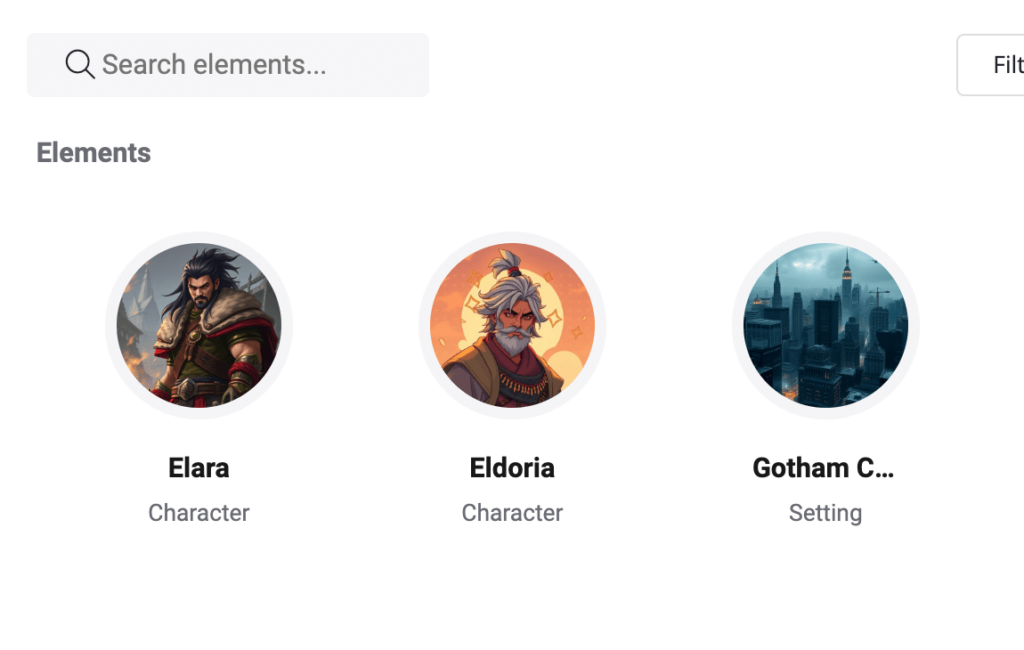
For those who want a dedicated space to store ideas, Squibler provides an Elements feature, which acts as a built-in story bible. You can create and manage notes for characters, places, and other key story details, keeping everything in one place for easy reference.
When it comes to exporting, Squibler supports multiple formats, including TXT, DOCX, PDF, and Kindle. However, Kindle users should note that the table of contents doesn’t come out perfect yet and may require manual adjustments.
I also love how the tool supports collaboration and project management with goal setting, unlike any other tool that I’ve experienced for book and manuscript writing. This makes it one of the top options in the market so far.
Price: Free with premium plans. Starts at $29 per month or $192 on an annual subscription (which equates to $16 per month).
Reedsy Studio
Reedsy Studio is a free tool built for authors at every stage of their writing journey. The professional interface is a great motivator when you’re just starting out — and then, when you’re ready to publish, you can format and export your book completely for free.
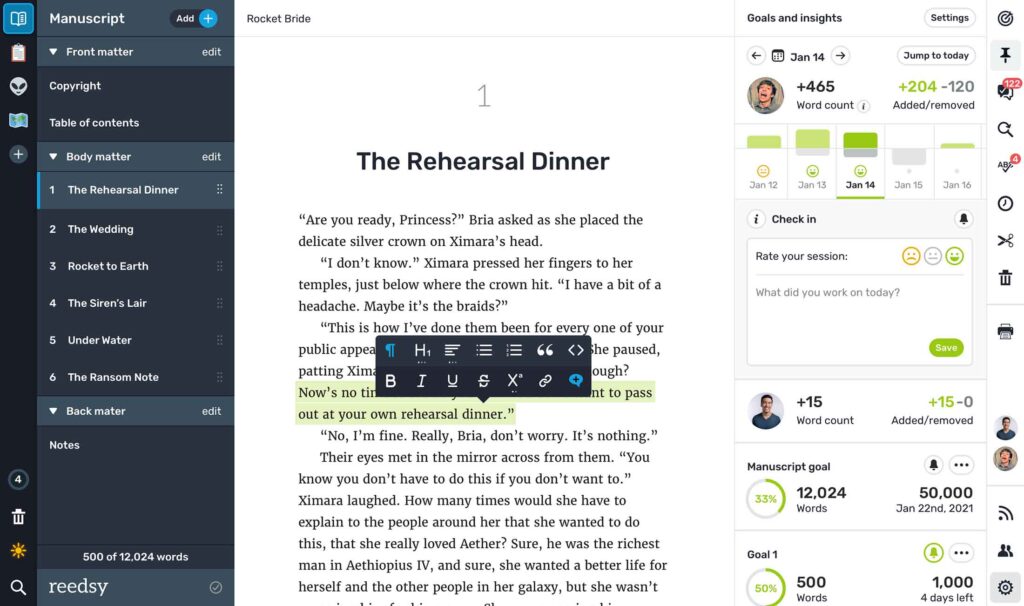
This app is the perfect place for beginner and veteran authors alike to plot, write, edit, and format their books. Originally launched as the Reedsy Book Editor in 2016, Studio today offers customizable writing goals, easily arrangeable front and back matter, and high-quality formatting for an unlimited number of books.
Studio is also web-based, so anyone with an internet connection can use it — and it works on any browser, with various extensions, which I love for the flexibility. Furthermore, all the essential features mentioned above are free.
For those who wish to upgrade their writing tool, however, there are also a couple of paid tiers: one for “Craft” and one for “Outlining”. The Craft tier includes more advanced stats and detailed goals, daily check-ins for accountability, unlimited version history, and Dark Mode.
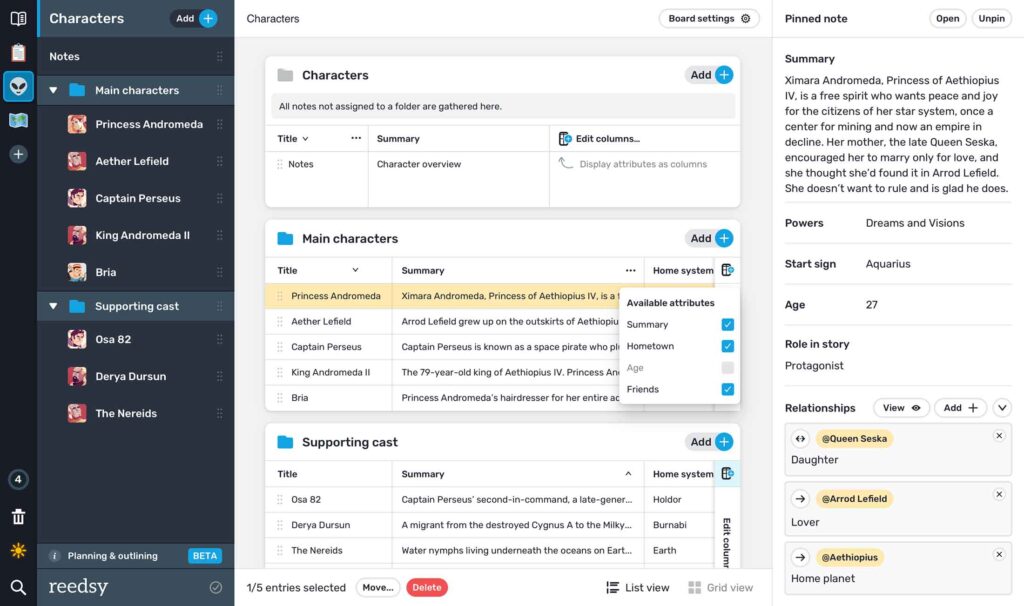
The Outlining tier, meanwhile, is the final word in integrated plotting and writing. This plan allows users to plot their books using “Boards”, which simulate a real-life corkboard — complete with virtual cards (called “Notes”) you can adjust to suit your needs. There are even story structure templates for things like the Hero’s Journey, in case you need some extra guidance. I’m looking forward to seeing which other templates they release!
For anyone who’s serious about writing but would rather avoid spending too much upfront, Studio is just the ticket. Try the free version today, then pick and choose your preferred tiers to cultivate the interface that’s right for you.
Price: Free for core functions (writing, goals, stats, formatting). $4.99/month for Craft plan, $7.99/month for Outlining plan, or $10.99/month for both. Learn more here.
Soda PDF
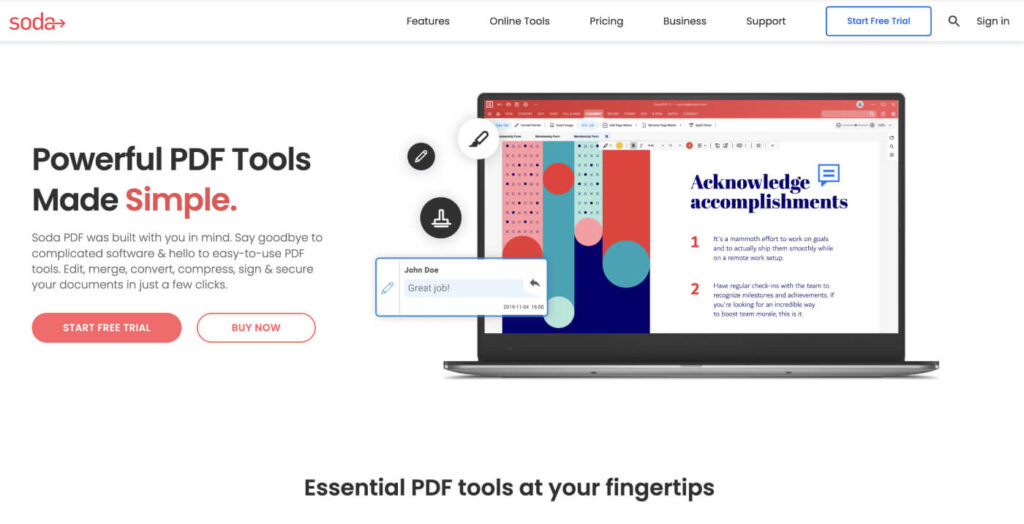
Soda PDF provides efficient tools, available online and offline, to help anyone accomplish their document goals in just a few clicks.
Also, the tool makes it dead easy to export your content in PDF, HTML, RTF, and DOC formats, among others. If you want to copy and paste your content into Google Docs (which is what I do) or WordPress, you only need to select the right option and you’re done. There’s no need to fix the formatting after you export your content, unlike other writing tools.
However, if you want to export it as PDF for other purposes, you can simply change Word to PDF and then share the file however you want.
Price: Standard plans: $7.86 per month.
Power Thesaurus
Power Thesaurus is a thesaurus tool—a tool for finding synonyms and acronyms—specifically made to find interesting variations of common words.
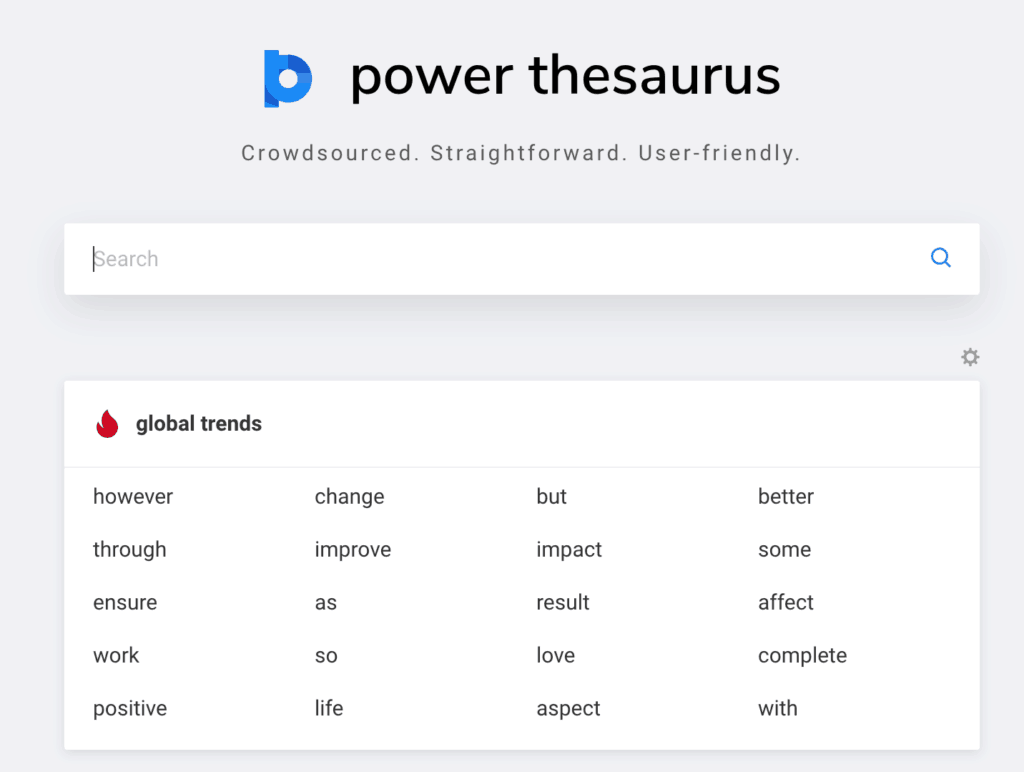
The most famous thesaurus tool is Thesaurus.com, which is from the same company that manages Dictionary.com.
The reason why I don’t mention that tool and instead mention Power Thesaurus is that the latter is better suited for content writers like myself.
I honestly don’t use thesaurus tools or dictionaries too often simply because I don’t need them. It’s true that writers need to have a varied language so they don’t repeat the same words over and over, making their content boring and repetitive.
The way I improve my vocabulary is by reading and hearing books all the time. As I’ve explained in my piece on becoming a better writer, reading is one of the best ways to improve your writing.
Sometimes, however, I see myself repeating certain words and expressions, like the superlative “very,” which I believe lower the quality of my writing. In such cases, I take the expression and paste it into Power Thesaurus.
Let’s say I wrote that something made me “very important.” Not a bad word, but not descriptive enough. If I put that expression in Power Thesaurus, here’s what it would bring me.
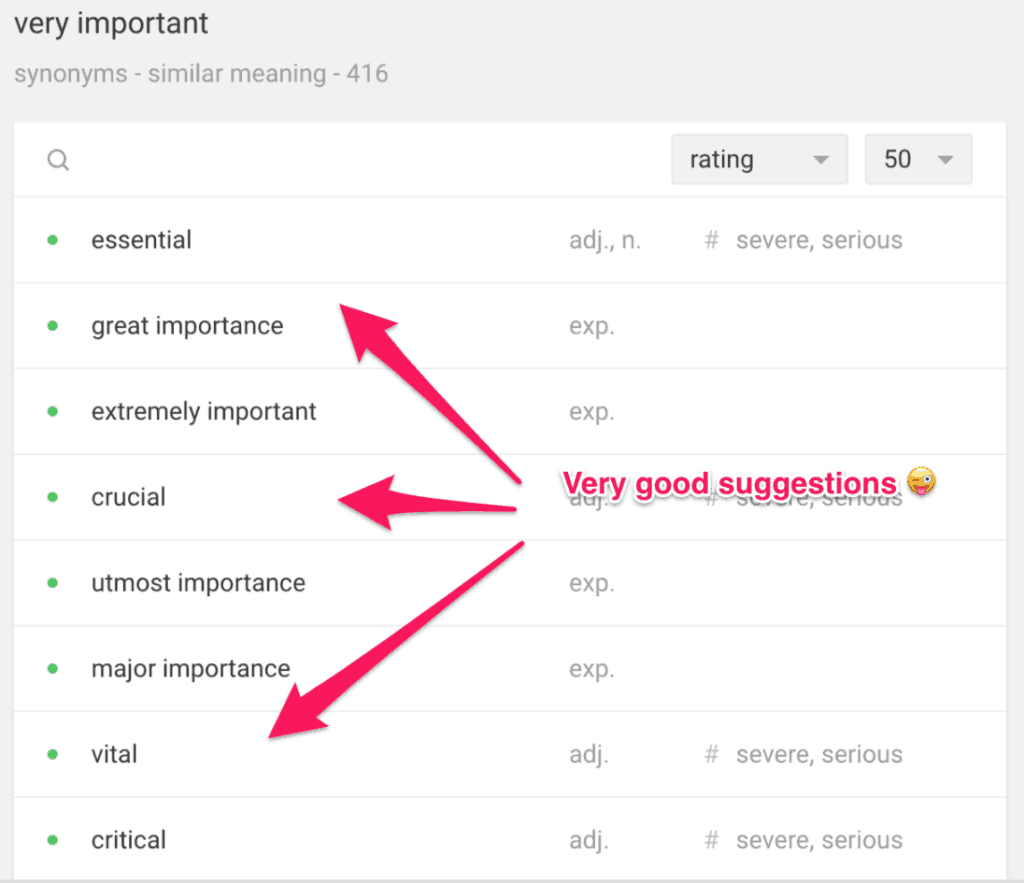
With such suggestions, I can improve my writing, adding more variety to the words I use and making my content more descriptive and precise.
I believe the word choices you make say a lot about yourself as a writer. If you use clichés and other commonly used words and expressions, you will never be able to become the type of writer you could be—one that engages all the reader’s senses and imagination.
Power Thesaurus is a tool that will help you find new expressions that will enrich your vocabulary and, consequently, make you a better content writer.
Price: Free.
EditGPT
EditGPT is an AI-powered writing tool designed for creating high-quality content across multiple platforms. It streamlines the writing process by offering an intelligent assistant that suggests edits, improvements, and enhancements for your drafts, making content creation faster and more efficient.
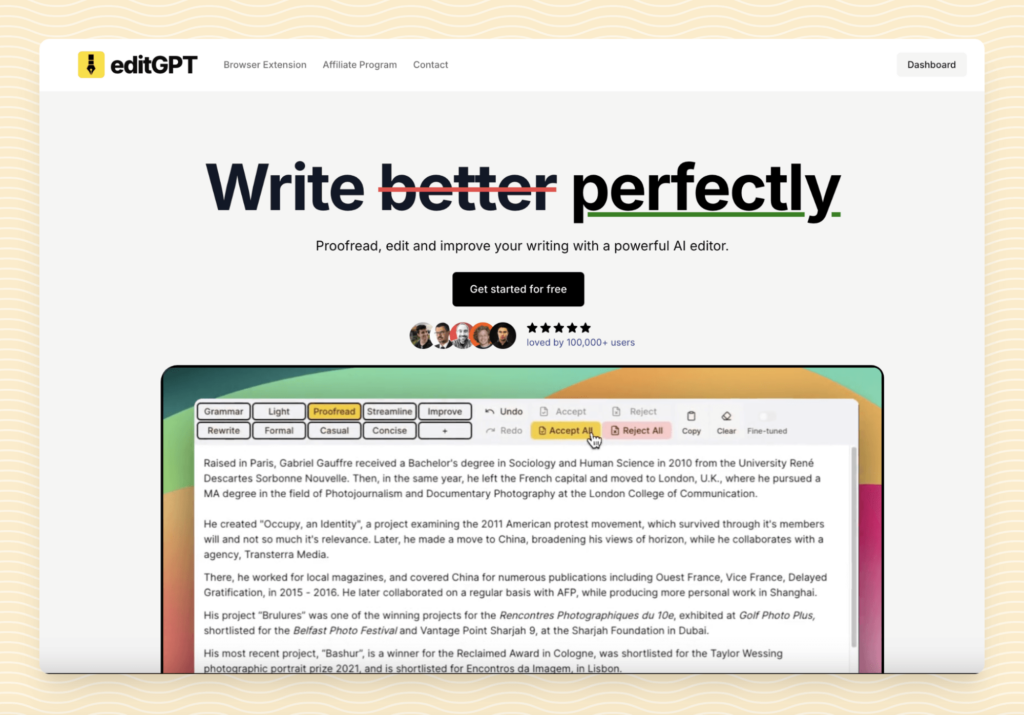
One standout feature of editGPT is its ability to turn unstructured thoughts into well-organized content. Unlike other tools like ChatGPT, which tends to preserve the structure of your input, editGPT allows for more freedom in rearranging sentences. This makes it much more effective for transforming your rough ideas into polished, coherent pieces.
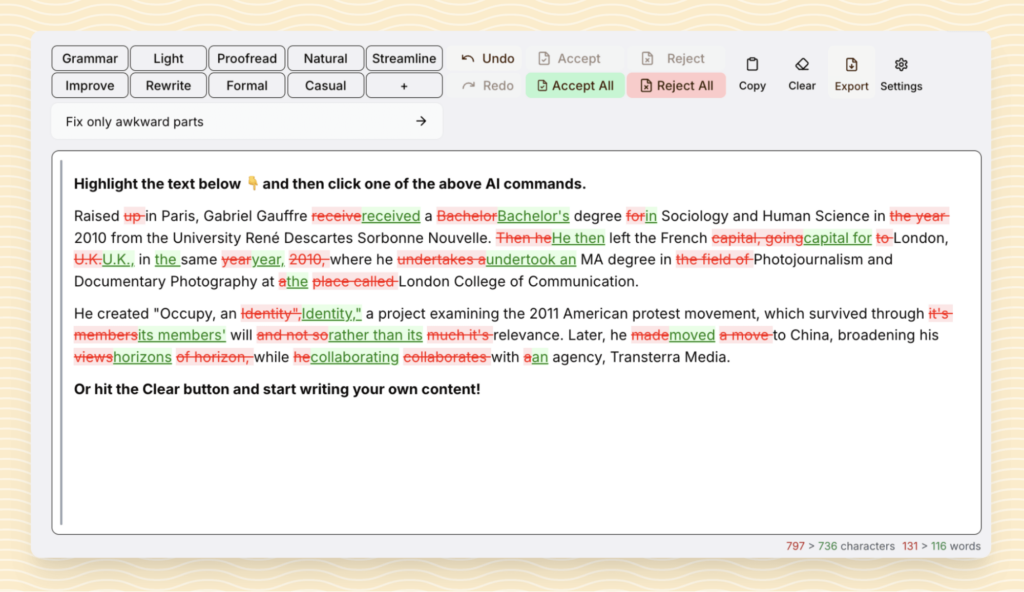
EditGPT also includes advanced AI suggestions, which are incredibly helpful for enhancing your work. You can improve your drafts by selecting specific sections and applying various prompts like “Make it more engaging” or “Simplify the language.” These AI-generated improvements make the editing process effortless and fast.
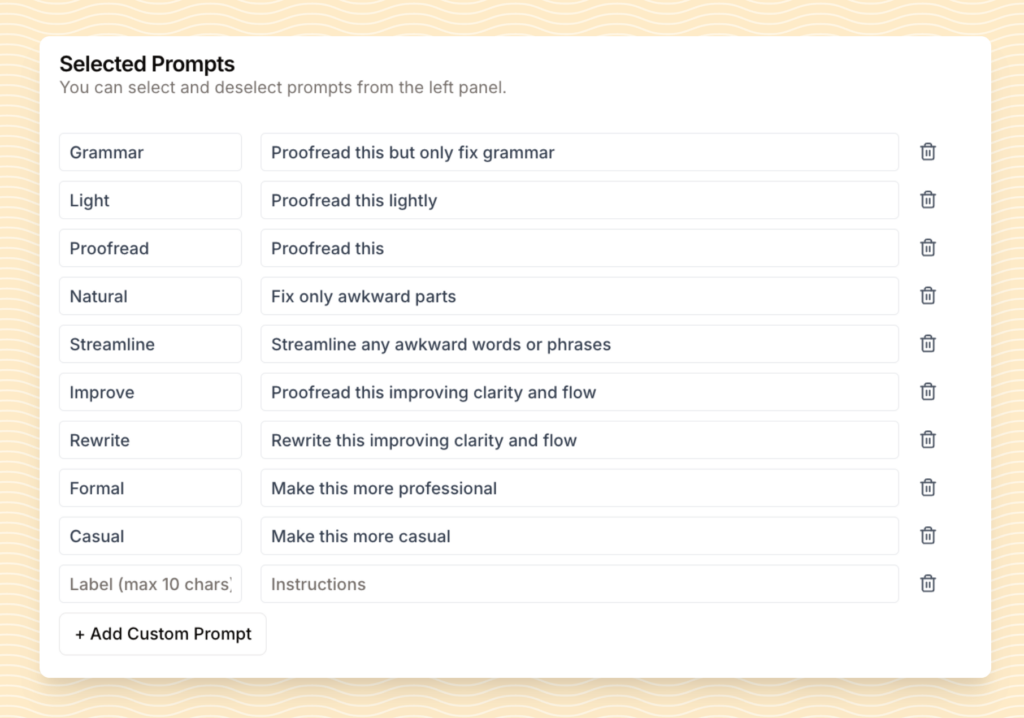
A particularly useful feature is the tone adjustment tool, which allows you to adapt the style of your content based on your target audience. This ensures that each piece of content sounds just right, whether it’s formal, conversational, or persuasive.
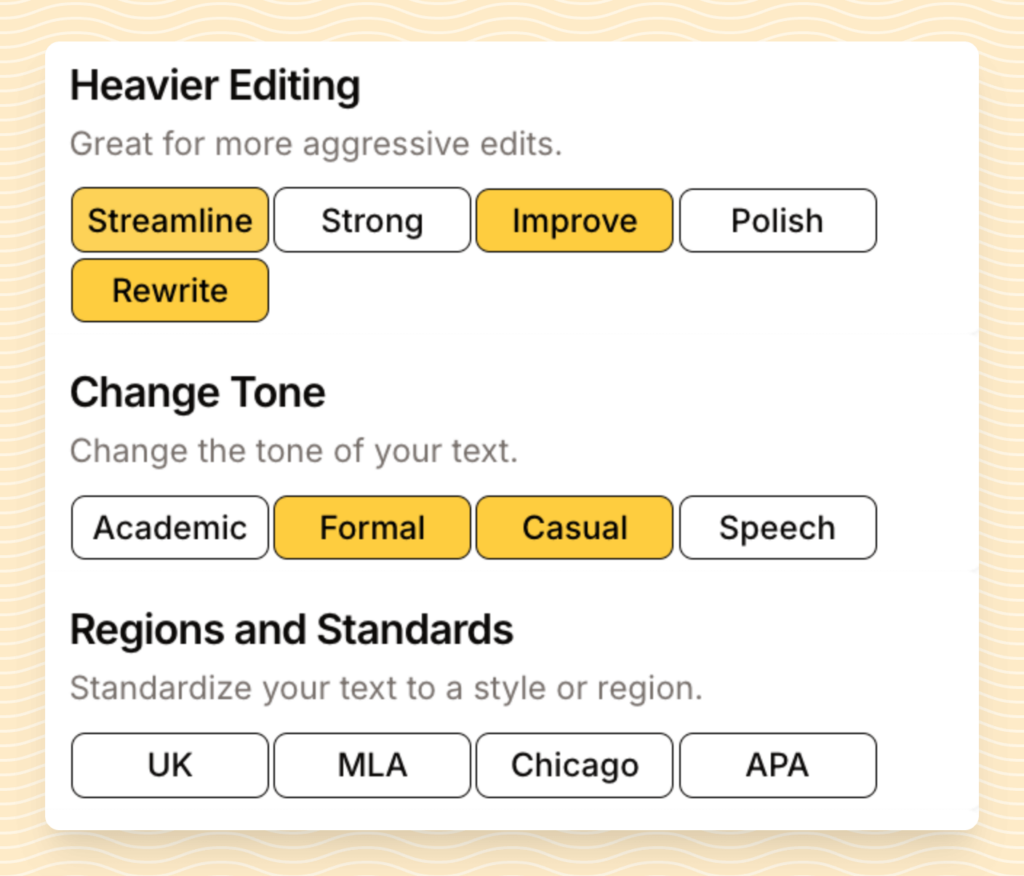
What I personally enjoy about editGPT is its ability to integrate smoothly into my writing routine. I can work on content without switching between multiple tools, and the AI features quickly suggest improvements to help me refine my posts. It’s been a time-saver for me, especially when I need to polish a piece of content before publication.
Price: Free with premium plans starting at $9.99 per month.
Conclusion
So there you have it, the best writing tools I use to develop all my content.

